Getting Started with WiFiWeave
Follow this guide to create your first WiFi plan in minutes.
1. Create Your Account
Click on Register and enter your name, email and password to create your account.
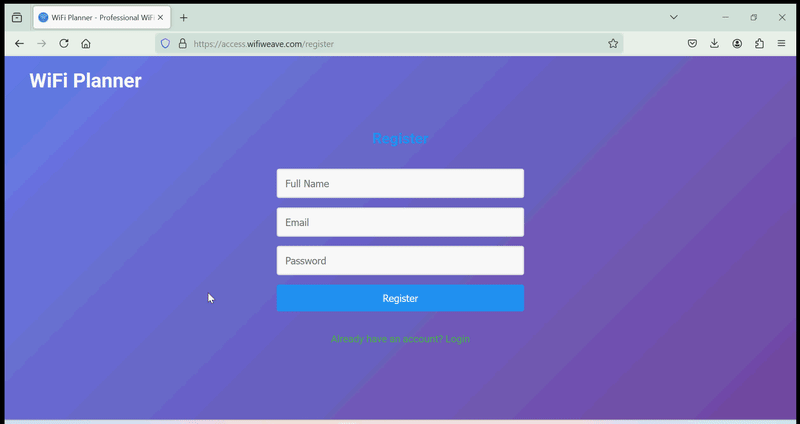
Once you have created your account, you will be redirected to the login page.
Basic Plan Features
- Floor plan management
- Manual wall placement
- Manual AP placement
- Basic signal strength visualization
Premium Plan Features
- Floor plan management
- Automatic wall detection
- Advanced visualizations
- Auto-planning capabilities
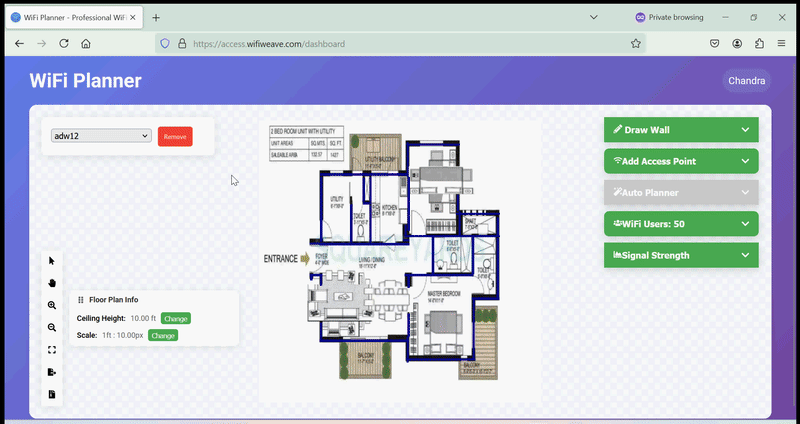
2. Upload Your Floor Plan
Click on the "Upload Floor Plan" button in the toolbar, enter the name of your floor plan and click on "Browse".
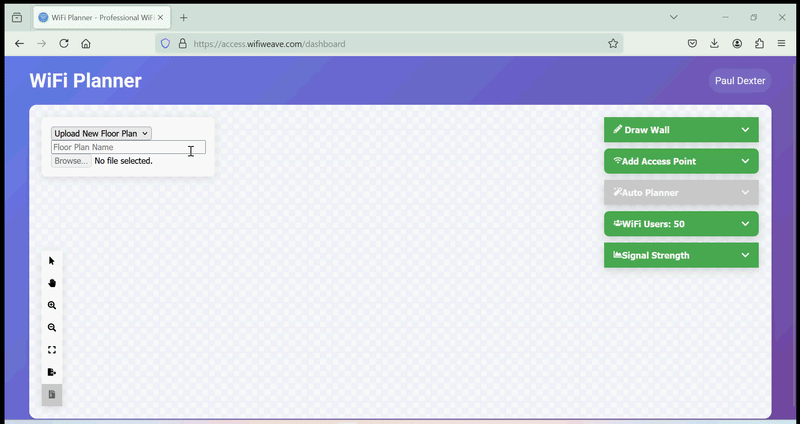
Select the floor plan you want to upload from your device.
Supported Formats
Upload your floor plan in PNG or JPG format. For best results, use high-resolution images with clear wall definitions.
Pro Tip
Clean, architectural drawings work best with our automatic wall detection feature.
3. Set the Scale
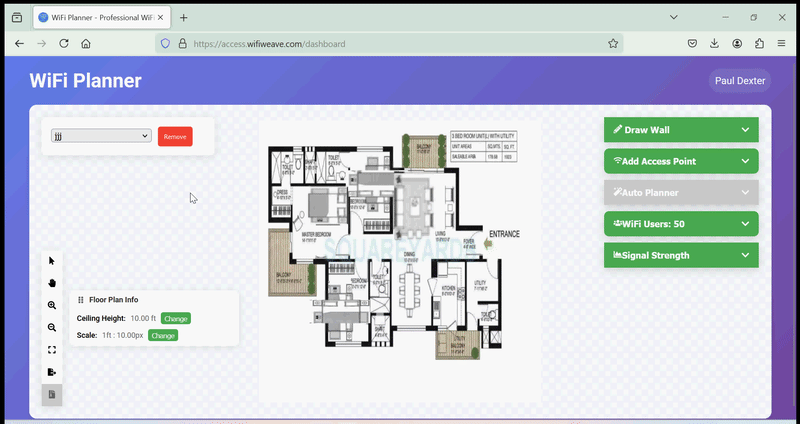
Accurate scaling is crucial for precise signal predictions. Here's how to set it:
- Click the "Change" button in the toolbar
- Click two points on your floor plan with a known distance
- Enter the real-world distance between these points
- Click on "Save" to set the scale
4. Draw Walls
Click on the "Draw Walls" menu in the toolbar and select the wall type. Click on the floor plan and draw the walls by clicking and dragging on the floor plan.
Manual Wall Placement
Click and drag to draw walls. Select wall types to accurately model signal attenuation:
- Concrete (12 dB loss)
- Drywall (3 dB loss)
- Glass (2 dB loss)
Automatic Wall Detection
Premium feature that automatically detects and places walls from your floor plan.
5. Place Access Points
Click on the "Add Access Point" menu in the toolbar and select the access point model. Click on the floor plan to place the access points. The signal strength heatmap will be updated automatically.
Access Point Configuration
Select the access point model to move it and configure it's frequency.
6. Analyze Coverage
Click on the "Signal Strength" menu in the toolbar to view the signal strength and other visualizations. After selecting the visualization, the heatmap will be updated automatically.
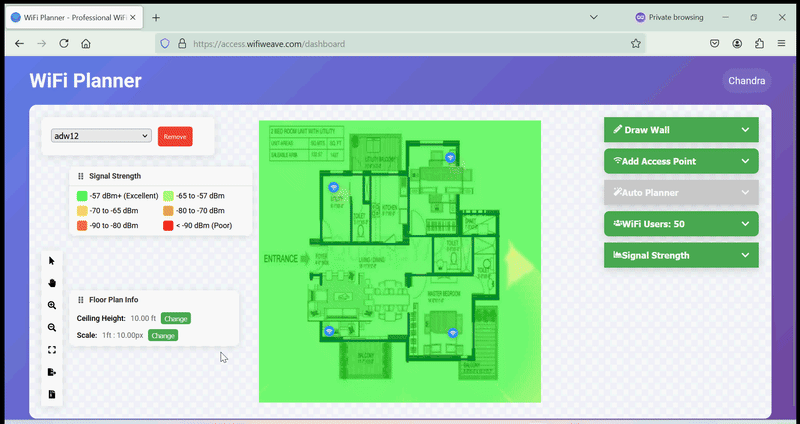
Basic Visualization
View signal strength coverage with intuitive heat maps.
Premium Visualizations
- Data rate
- Signal-to-noise ratio
- Channel overlap
- Client capacity
- Network capacity
Next Steps
Now that you're familiar with the basics, explore our detailed guides: